Tuesday, December 10, 2013

Advent Calendar - starting a tradition

I have a very fond memory of advent calendars from my childhood, you know the ones with the little tiny chocolates. I love the idea of creating our own family traditions and an advent calendar was a great place to start. After searching and searching - I settled on something simple that could be easily packed up each year.


I went with a combination of activities and small gifts and so far (at Day 10) it is a very exciting time each morning. I had my sister (Miss P's aunt) and grandma send some items in the mail and plan to expand on this by asking other family who we are not with at Christmas to send some items with notes.

Supplies:
  • Wooden Shapes x 24
  • Paint
  • Clothes pins

Day 1 - Letter to Santa


Day 2 - Smarties (to share with Mommy on her bday)


Day 3 - New hair clips


Day 4 - Tattoos

Day 5 - Paint with water coloring book (great day time activity with the hubby)

Day 6 - New undies


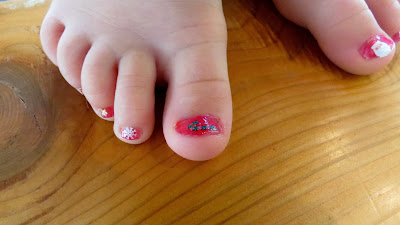
Day 7 - Paint your toenails


Day 8 - Race Car

Day 9 - New Christmas socks (perfect timing because it snowed today)


Day 10 - 400 stickers (only a gift an Aunt could give)


Day 11- Tattoos


Day 12 - Make your own bird classes


Reading intently


Day 13 - Gliding bird


Day 14 - Piggie bath sponge

Day 15 - Go for drive with mommy and look at the Christmas lights

Day 16 - Grandma and Grandpa arrive from Australia, as a special treat have hot chocolate at the airport


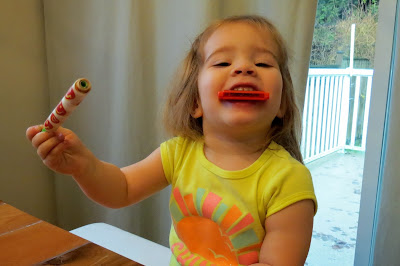
Day 17 - Gift from Amy & Grandma T, Harmonica


Day 18 - Bath Sponges


Sunday, October 6, 2013

Chairs on a budget

After building our table, we definitely need some chairs that could measure up to the sheer size of this table (you can see the table here). We already had 2 chairs from the condo, but needed at least 6 more, and so the search started. I was in love with some I found from RONA but of course they were discontinued and sold out (http://www.rona.ca/en/stackable-chair) and the hubby was hesitant about having resin chairs with such a beautiful wood table.

I just happened to stumble upon some free wood ones on CL and despite needing some BIG cosmetic help, I could see they could be gorgeous!! Off I sent Hubby to pick them up and load as many as he could fit into our car. We ended up with 6, although I would have been happy with a couple more.

Total cost: $70 (and  bit of sweat)
Chairs = FREE (and about 20 minutes in gas to go pick up)
Spray paint = $30
Fabric = $40


After a bit of research we decided to go with spray paint and found some very helpful tips here http://www.sheknows.com/home-and-gardening/articles/952805/how-to-spray-paint-furniture-for-a-professional-look

They needed a fair bit of sanding, which was pretty easy with a palm sander.
Then we used Krylon (indoor/outdoor paint) in satin white, and of course primed first!

Sand, sand, sand


We did six coats of paint to get our desired finish...which went relatively fast as it only need about 10 minutes to dry between coats (just about 5 cans of spray paint).

We choose outdoor fabric so it could withstand the kiddies.


They compliment our other two chairs nicely and I really love the final look of the table and chairs together - not bad for $70 and a couple of days!

Saturday, September 28, 2013

A table for 8 or more...DIY

After moving into our new home, our tiny apartment dining table just wasn't cutting it. After searching and searching (department stores, ikea, craigslist...and on and on) and not finding anything.  The hubby suggested we make our own. Since he is not one to quickly suggest any project, and usually ends up reluctantly helping me with my latest endeavor I jumped at his suggestion and started looking for a design. We settled on something we could do without having to run out and buy a table saw, since we are both relatively novice when it comes to working with wood we needed something we could do with only a few tools (drill, sander, hack saw, time and a lot of muscle). We based our design on this gorgeous creation from a beautiful mess http://www.abeautifulmess.com/2012/12/elsies-.html

We made a few modifications to suit our own needs - I have done my best to summarize our process below. I must say this is my favourite creation to date and we have already had many nights of game playing, dinners with friends and are really enjoying our daily meals at this table. All said and done it took us about 5 days to complete and cost just over $200. I am confident that anyone could complete this project, and I am sure there are little things that can be improved, but for novice wood workers we are very happy with the way this turned out.

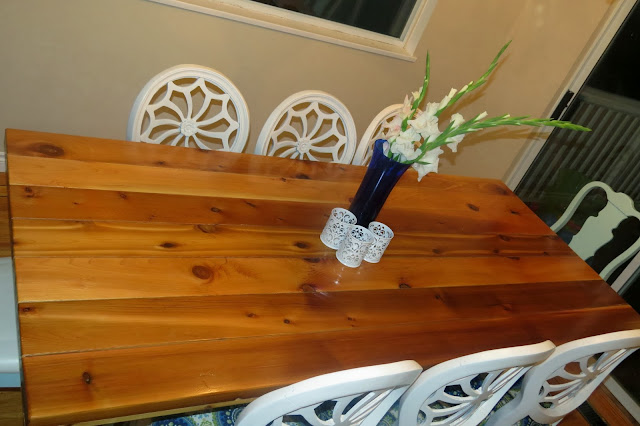
We went big and at 7 feet long can fit 8 - 10 for a great meal! We were able to find 2 matching table bases from a second hand furniture shop (a steal at $50 for the pair) to support this long table top. I am still working on a post about the chairs (they were a great find...but needed a little sweat to get them to what you see below).


Once we settled on our design (and decided the length) we made a list and hit the hardware store. We decided on Red Cedar (which came in 2 x 6 x 8) at home depot and used pine for the framing underneath. We bought the following:
  • 6  planks ( 2 x 6 x 8) of red cedar (we selected carefully and looked for pieces that we liked the look of and had them cut down to 7 feet long at the store)
  • 2 planks of (1 x 6 x 8 ) pine (used underneath for framing)
  • 3 pieces of (1 x 2 x 8) pine (used underneath for framing)
  • 100 wood screws
  • 2 quarts of polyurthane seal (+ brushes)
  • 1 tube of silicone caulking
  • Tack cloths (to remove debris prior to sealing
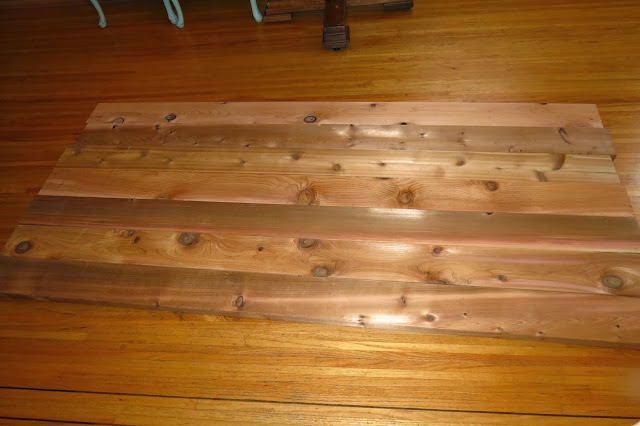
We also needed the use of a palm sander, and a hack saw with cutting box. It dosent look like much below - but we hoped it would end up looking like a table! Cost for the wood and supplies was approx $160.


Next we laid out a pattern of how we wanted the table to look (which planks looked best and in what order).


Since we used 2 x 6's we decided to beef up the frame slightly from the original design. We also need a space wide enough to affix the table bases.

We flipped over all the boards and worked from the bottom side (of our chosen arrangement above) and started to screw the planks together using the pine as framing starting in the middle (measuring to find the middle of the table). We cut down the pine to fit across the width of the table and screwed away (we used at least 10 screws per pine plank). We used the whole box of 100 - it definitely added strength. I ended us sitting on top of the planks and holding them in place while the hubby screwed.


Then we added additional framing on either side (where we would later attach the 2 table bases).  


Finally we used the 1 x 2's  to frame around the outside, making the cuts as we went using our hack saw, then screw, screw, screw...


Then came the time consuming part of the project, sanding and sealing. Since we intended on using this table for a lot of eating, we used clear silicone to seal the gaps in between the planks so food particles would not gather there over time.

We sanded the table top  and all of the framing around the edges, and then 6 coats of polyurethane (something that the hubby did all of and I was so grateful).


Finally we attached the table bases (which eventually we will paint, but for now we have left as we purchased them second hand).


and shortly after.. our first round of carcissone (looks pretty good). We can't wait to host our first big thanksgiving dinner in October.


Thursday, September 12, 2013

Easy Peanut Butter and Oat Cookies (Gluten free)

In the morning I usually check in with Miss. P and ask her - what we should do today? 9 times out of 10 she says baking! Since I don't really consider myself 'good' at baking, it makes me so happy to know that she loves it, even if it doesn't always end up the way we thought it might.

I think the key to decent baking (if you don't consider yourself a baker) is to pick and stick with some easy recipes that always yield good results. Limited on ingredients (meaning its been a bit since grocery day) I looked for something that we could make with whatever we had on hand.This recipe was very easy, had only a few ingredients and the cookies turned out moist and chewy (bonus they are gluten free).


I found the original recipe here http://www.tasteofhome.com/recipes/peanut-butter-oatmeal-cookies-4, but doubted the yeild so I doubled it (as below). Next time I will try some add-ons (chocolate chips, coconut?)...

Peanut Butter & Oat cookies (approx 24 cookies)

Ingredients
  • 1 cup Peanut Butter 
  • 1 cup packed brown sugar
  • 2 eggs 
  • 1 ½ cups quick-cooking oats
  • 1 teaspoon baking soda
Instructions
  1. Pre heat oven to 350°
  2. In a medium bowl, cream peanut butter and brown sugar until fluffy.
  3. Beat in egg.Add oats and baking soda to mixture and mix well. 
  4. Place spoonfuls on greased baking sheet 2 in. apart and flatten slightly.
  5. Bake at 350° for 8 - 10 minutes (I found they need at least 10 minutes in my oven).
  6. Store in an airtight container (if they don’t get eaten right off the cookie sheet!!).
Here we go...


They didn't last very long...

Monday, September 2, 2013

Chocolate Coconut bites...and a beach date


With friends in town, it was a perfect night for sushi and treats on gorgeous kits beach. I have been wanting to try theses for a while ... so here goes. I found the original recipe here http://fastpaleo.com/recipe/dark-chocolate-coconut-bites/ , but adapted it a little (complete instructions at the end of this post).
Yummy!


Great shot!
 Ingredients
  • 1 1/4 cup shredded coconut
  • 1/4 cup melted butter
  • 2 tablespoons honey or maple syrup
  • 1 teaspoon pure vanilla extract
  • 4 ounces dark chocolate
  • Garnish (thick cut coconut, almonds or pecan) 


All packed up and ready for a beach picnic!
 Instructions


1.      In a bowl, mix coconut, butter, honey/maple syrup and vanilla extract
2.      Press into an ice cube tray (should make about 24 bites).
3.      Let cool in the freezer for 30 minutes.
4.      Melt the dark chocolate then spoon over top of the coconut mixture in ice cube tray.
5.      Top with garnish and freeze again until hardened.
6.      When ready to eat, let them come to room temperature for a few minutes, then enjoy (dont we look happy below??).